Acme.sh Setup
Debian / Ubuntu
Overview
Setup acme.sh for automated certificate deployment.
Assumptions
- Logged in as administrative user.
Create System User
Add a new acmesh system user and map the home directory to /opt/acmesh.
sudo useradd --system --user-group --create-home --home /opt/acmesh --shell /sbin/nologin acmeshExecute commands as the user using su.
sudo su -s /bin/bash acmesh -c "COMMAND_TO_RUN"Alternatively, switch to the user with su.
sudo su -s /bin/bash - acmeshInstall acme.sh
As the acmesh user, download the installation script from the project domain.
wget -O /opt/acmesh/acmesh-install.sh https://get.acme.shReview the installation script and run it.
sh /opt/acmesh/acmesh-install.sh email=[email protected]Verify a cron job was successfully created for acme.sh.
crontab -eThere should be an entry resembling the following at the end of the file.
0 2 * * * "/opt/acmesh/.acme.sh"/acme.sh --cron --home "/opt/acmesh/.acme.sh" > /dev/nullSelect Certificate Authority
Select a certificate authority for acme.sh to use for generating certificates. Refer to the acme.sh CA documentation for an updated list of supported certificate authorities.
This guide will assume Let’s Encrypt is being used.
/opt/acmesh/.acme.sh/acme.sh --set-default-ca --server letsencryptDNS ACME Validation
Provide acme.sh API credentials for your DNS provider. These will be used for DNS-based ACME validation when generating new certificates.
This example will use Cloudflare API tokens. The process is similar for most DNS providers.
Cloudflare API Token
Create an API token to interact with a Cloudflare Zone.
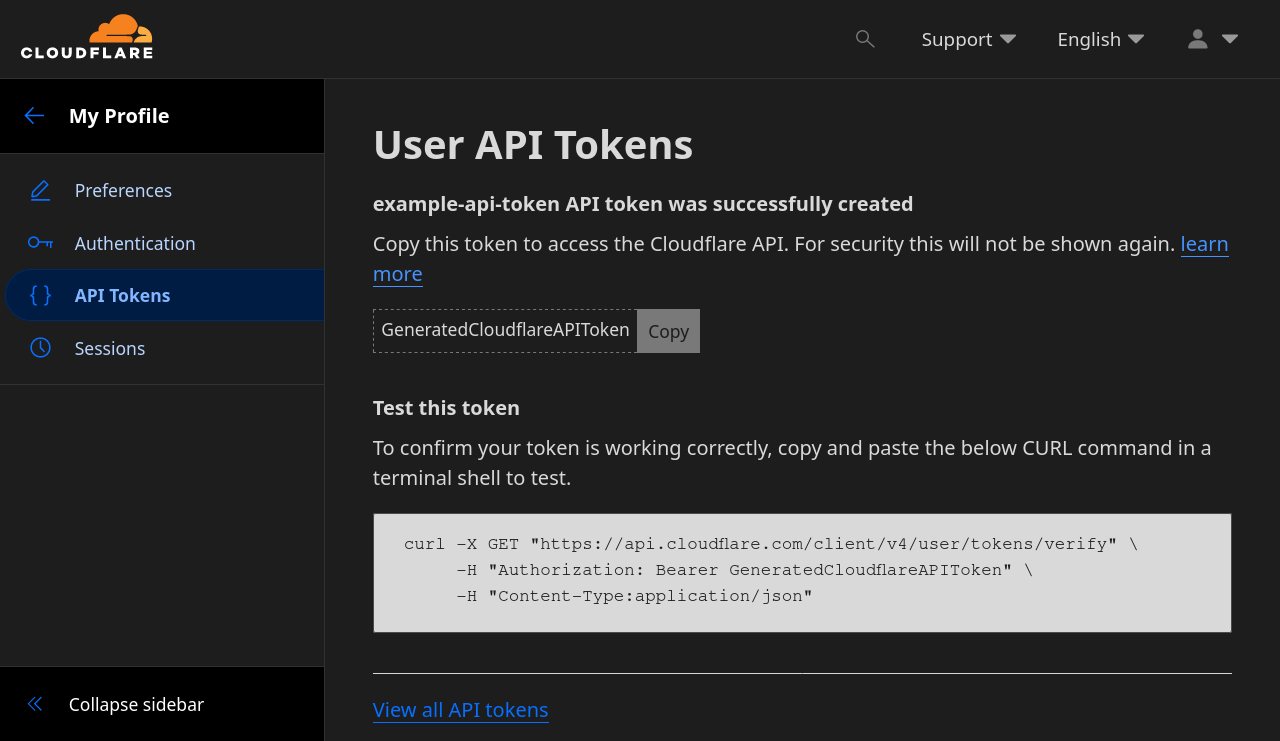
Navigate to the My Profile page and select the API Tokens tab.
Select Create Token. Configure the token with permission to edit Zone DNS. Only allow access to the zone resource required.
| Setting | Value | Description |
|---|---|---|
| Token Name | example-api-token | Choose a name to identify the token. |
| Permissions | Zone - DNS - Edit | Grant edit permissions for zone DNS. |
| Zone Resources | Include - Specific - example.com | Only include the zone that will utilize the token. |

Continue to summary and review the configuration, select Create Token.
When presented, copy the generated Cloudflare API token.
Configure DNS Provider
Configure acme.sh with the generated API token.
Start by modifying the permissions for the account.conf file so no other system users can view your API credentials.
chmod 640 /opt/acmesh/.acme.sh/account.confOpen the acme.sh account.conf configuration file.
nano /opt/acmesh/.acme.sh/account.confEnter the API information required by your specific provider. Refer to the acme.sh DNS API documentation and find your provider in the list.
Use the generated Cloudflare token and the target domains Zone ID.
CF_Token='GeneratedCloudflareAPIToken'
CF_Zone_ID='CertificateDomainZoneID'
Deploy Certificate
With acme.sh configured, a certificate can now be easily deployed.
Issue Certificate
Issue a new certificate for a domain of choice, or wildcard, with the following command. Consider using the --staging flag while testing to prevent being rate-limited by Let’s Encrypt. Replace the Cloudflare DNS definition --dns dns_cf with the flag for your specific DNS provider; this flag instructs acme.sh to use the DNS challenge.
/opt/acmesh/.acme.sh/acme.sh --issue -d example.com -d www.example.com --dns dns_cfInstall Certificate
Install the generated certificate files to the directory required by your application. The following demonstrates deploying the certificates to the Apache ssl directory.
Start by modifying the directory so the acmesh user can write files to it.
sudo chown -R acmesh:root /etc/apache2/ssl && \
sudo chmod -R go= /etc/apache2/ssl
Run the acme.sh certificate installation tool, specifying the locations to install certificates.
/opt/acmesh/.acme.sh/acme.sh --installcert -d example.com \
--certpath /etc/apache2/ssl/example-cr.pem \
--keypath /etc/apache2/ssl/example-cr.key \
--capath  /etc/apache2/ssl/example-ca.pem
You may also add the --reloadcmd flag to issue a command after the certificates are installed, this would require the acmesh user to have the proper permissions to run the command. For example, to restart Apache after a new certificate has been installed, add the following flag.
--reloadcmd "systemctl restart apache2"Errors
Missing API Key
If an API token is misconfigured, an error stating the API key and email is missing. The API token was probably misconfigured in the account.conf configuration file. Verify that CF_Token and CF_Zone_ID are not completely capitalized like the other variables, as this will not work.
Don’t switch to API key and email when getting this error, stick with API tokens to prevent account compromise.
| Correct | Incorrect |
|---|---|
CF_Token | CF_TOKEN |
CF_Zone_ID | CF_ZONE_ID |
You didn't specify a Cloudflare api key and email yet.
You can get yours from here https://dash.cloudflare.com/profile.
References
acmesh-official. “acme.sh Documentation .” 2024. ↩︎
acmesh-official. “acme.sh GitHub .” 2024. ↩︎
Cloudflare. “Cloudflare API Documentation .” 2024. ↩︎
Let’s Encrypt. “Let’s Encrypt Documentation .” 2024. ↩︎